
Photo Tour
| Tees | Yards | Par | H/C |
| Blue | 351 | 4 | 13 |
| White | 333 | 4 | 13 |
| Gold | 315 | 4 | |
| Red | 286 | 4 | 11 |
| Green | 230 | 4 |
Description:
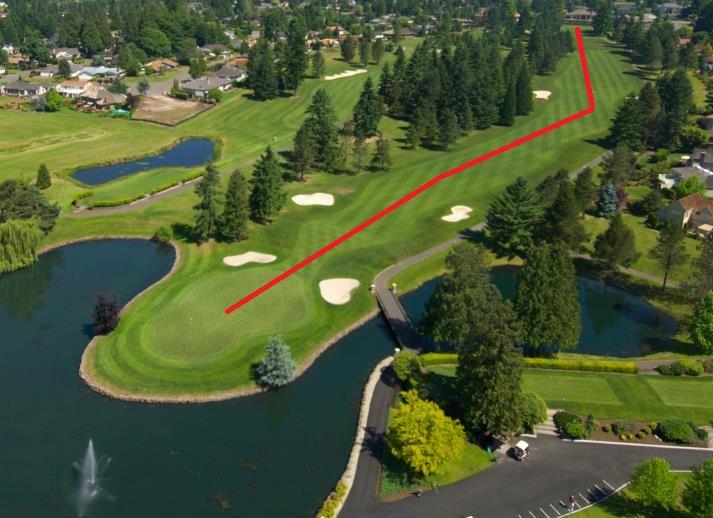
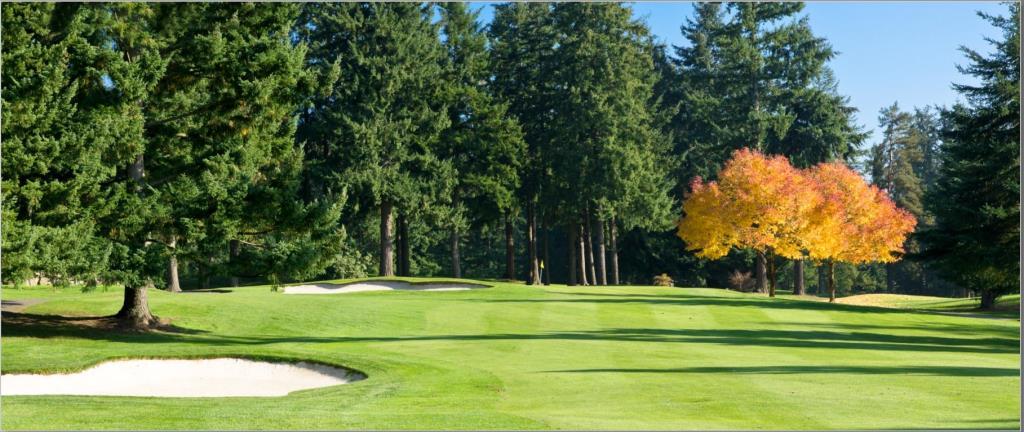
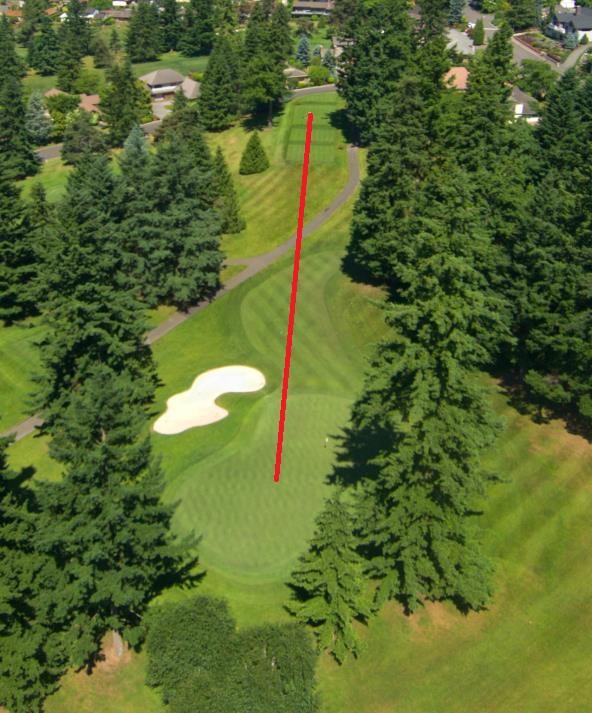
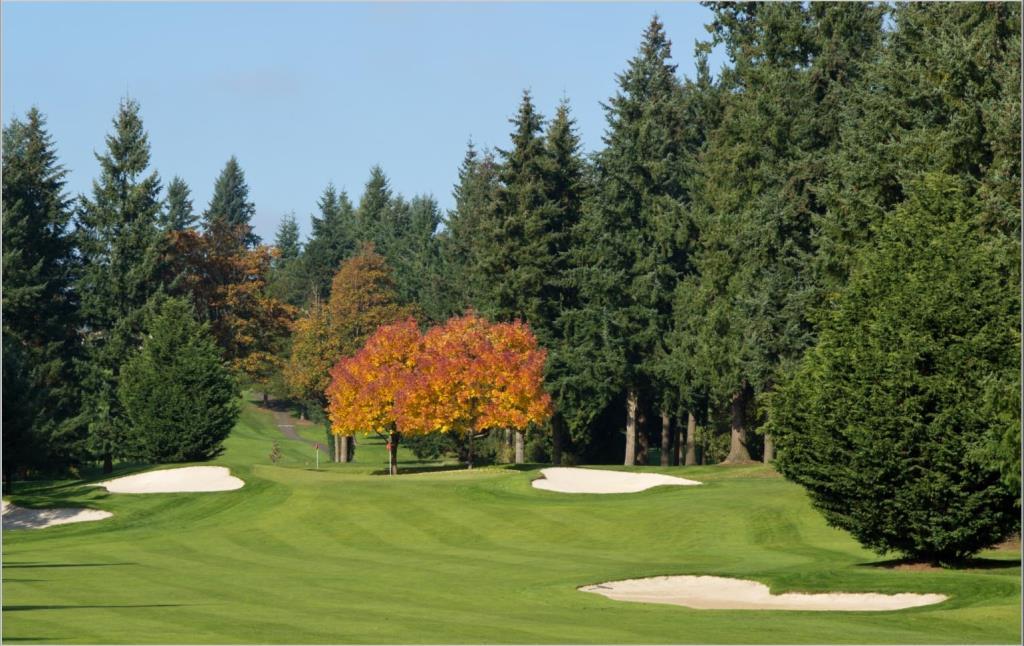
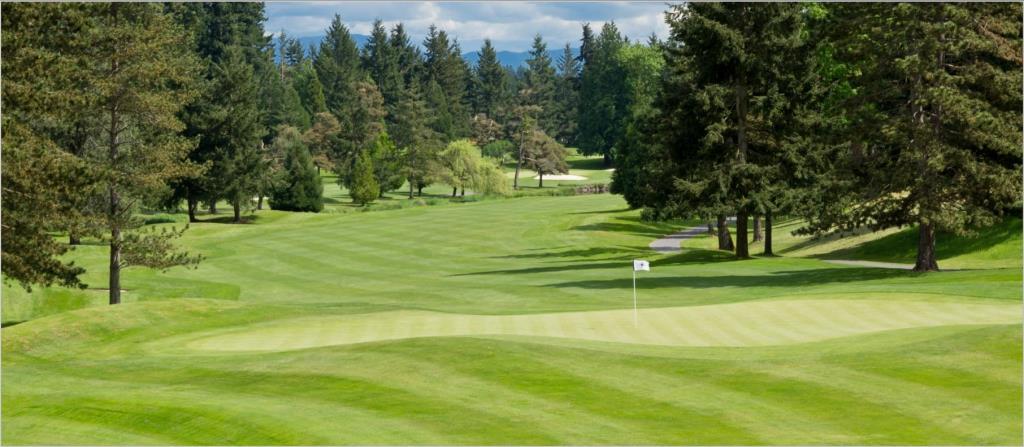
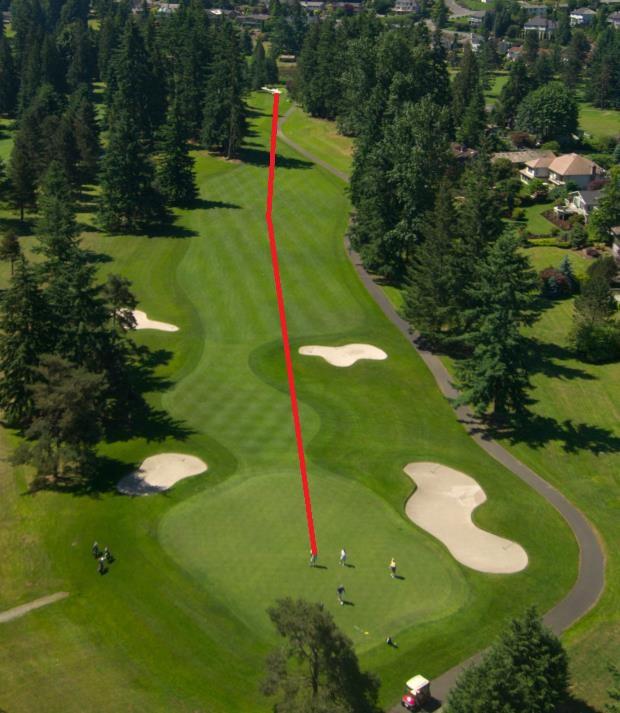
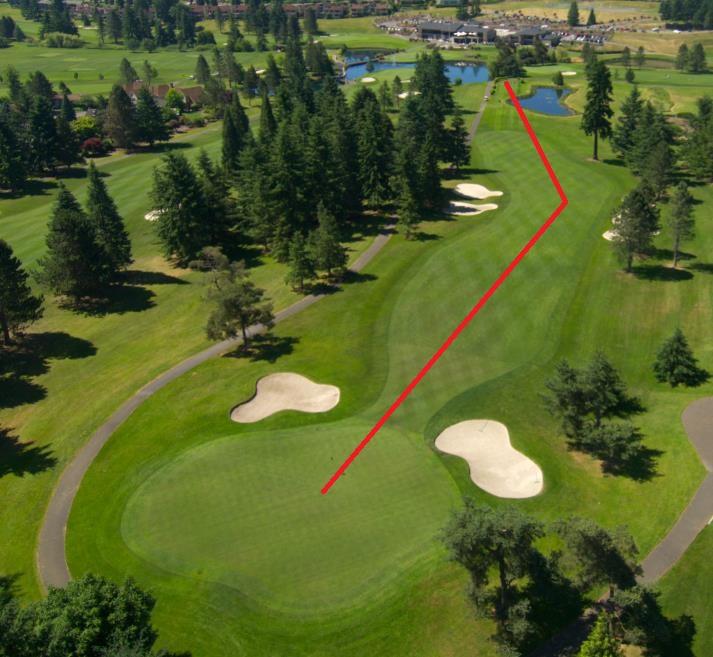
The open fairway welcomes you and invites the big drives. The homes left of the fairway are out of play but the large and stately trees near the green can offer a challenge.
Pro Tip:
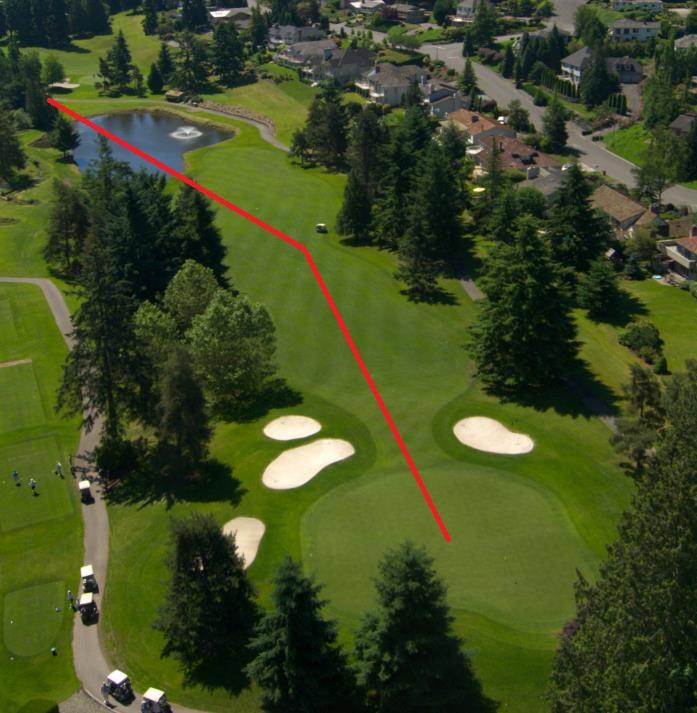
Par 4 slight dogleg right. The most important thing about the tee shot is avoiding the 3 bunkers in the fairway and getting it in the short grass. From there you should be left with around 125 yards to an elevated green with bunkers guarding front left and front right. A fairly flat green but anything on the right side has a chance to trickle off! Beware of the back left pin placement ... aim for the middle!
| Tees | Yards | Par | H/C |
| Blue | 355 | 4 | 9 |
| White | 340 | 4 | 9 |
| Gold | 325 | 4 | |
| Red | 255 | 4 | 13 |
| Green | 255 | 4 |
Description:
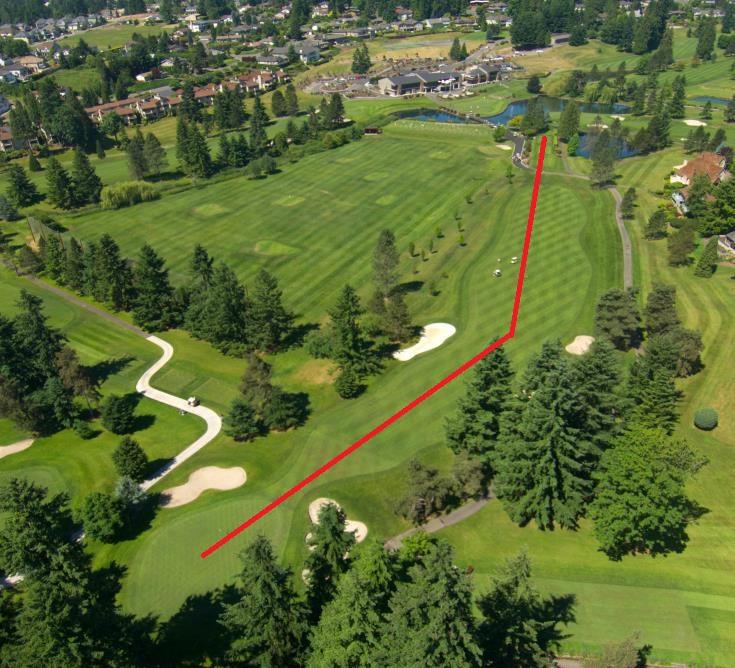
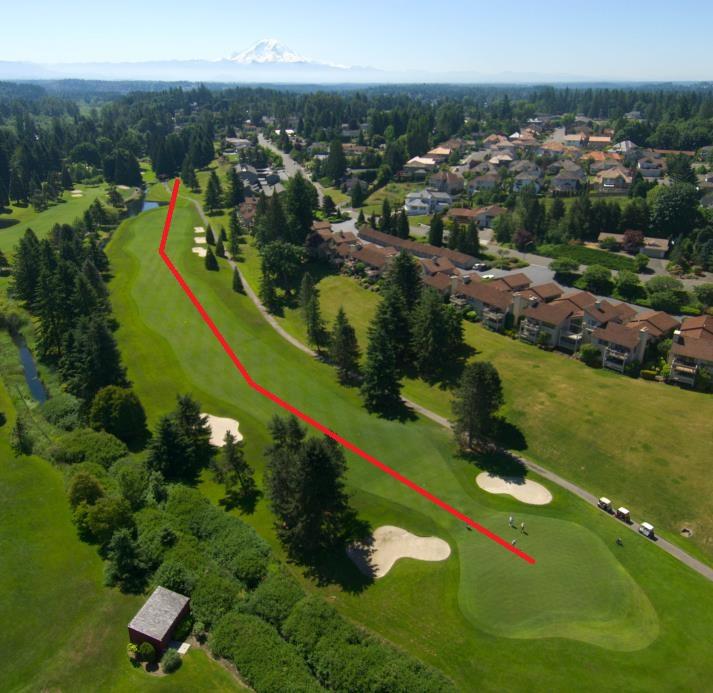
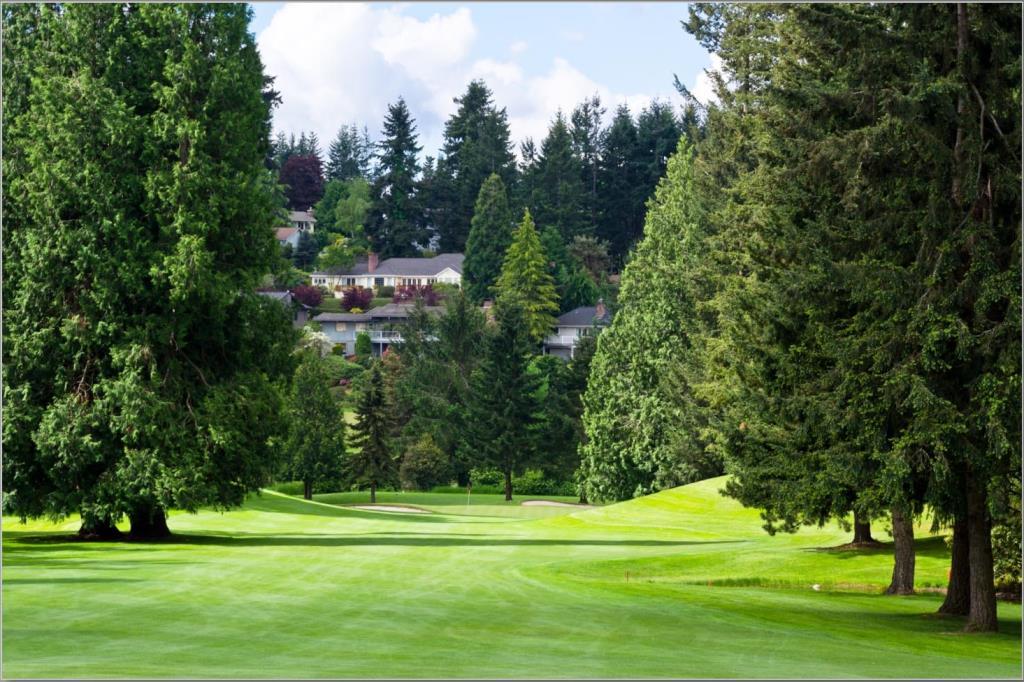
Originally known as the Palpitator, this hole can make your heart stop. It's uphill and plays longer than the yardage would indicate.
Pro Tip:
Par 4 slight dogleg right. This uphill par 4 plays much longer than the yardage. Driving the ball in the flat spot of the fairway will make hitting your second shot much easier. Hitting this green in regulation is a great accomplishment. Add 1-2 clubs when approaching the green from the landing area.
| Tees | Yards | Par | H/C |
| Blue | 176 | 3 | 15 |
| White | 158 | 3 | 15 |
| Gold | 137 | 3 | |
| Red | 120 | 3 | 15 |
| Green | 120 | 3 |
Description:
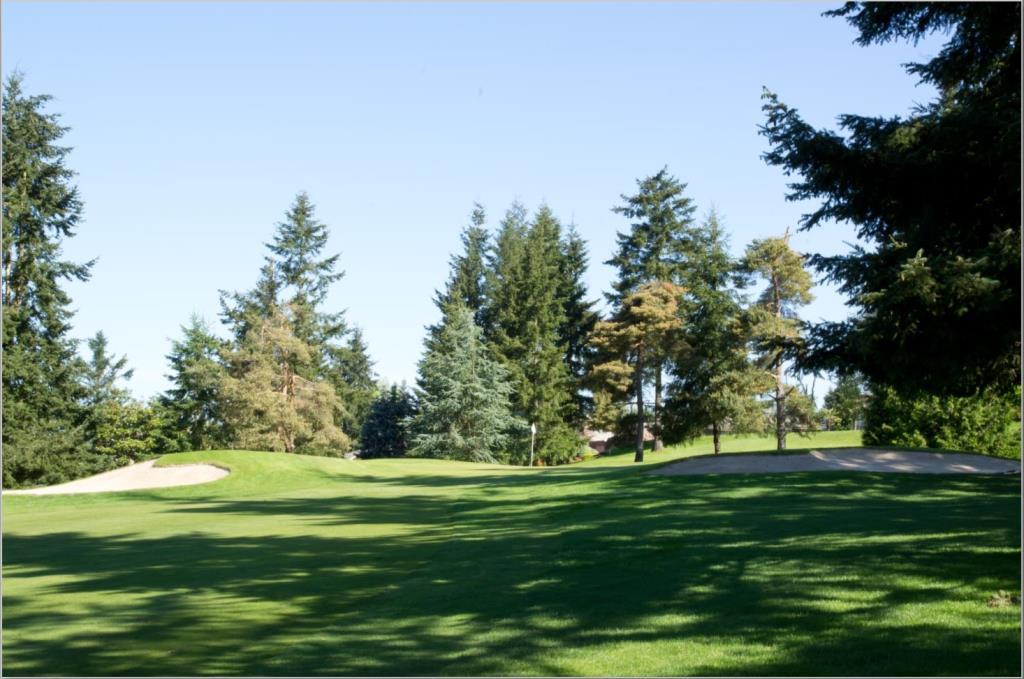
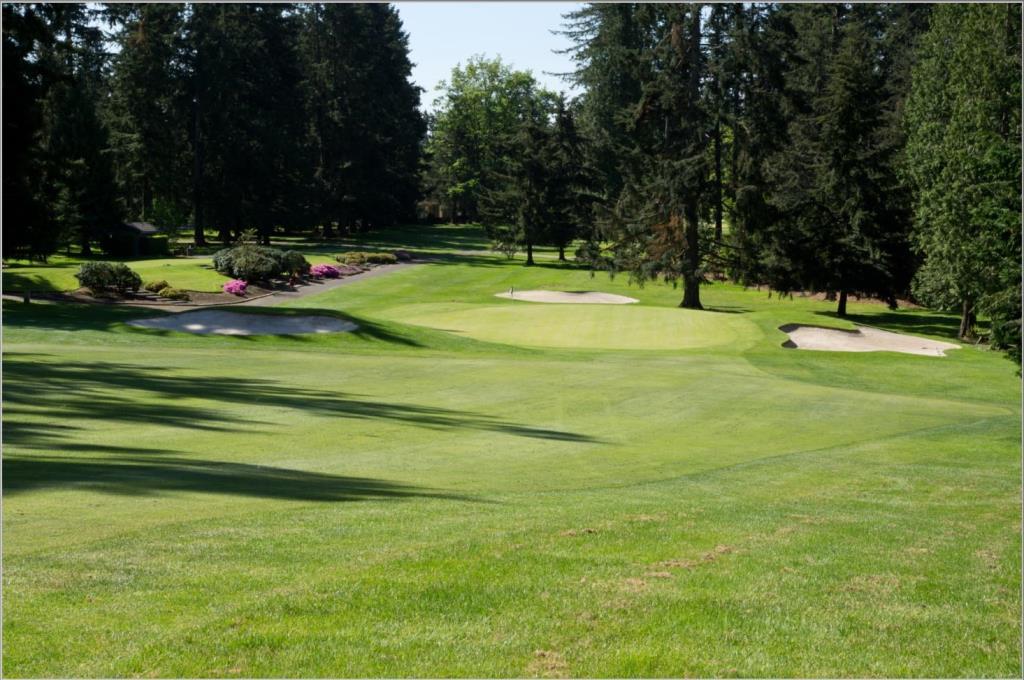
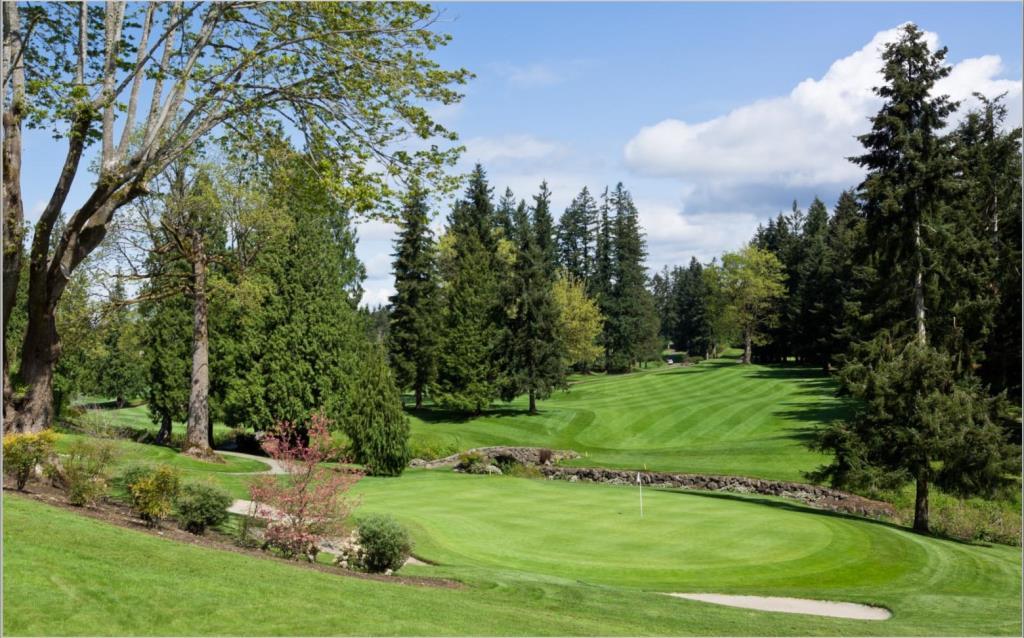
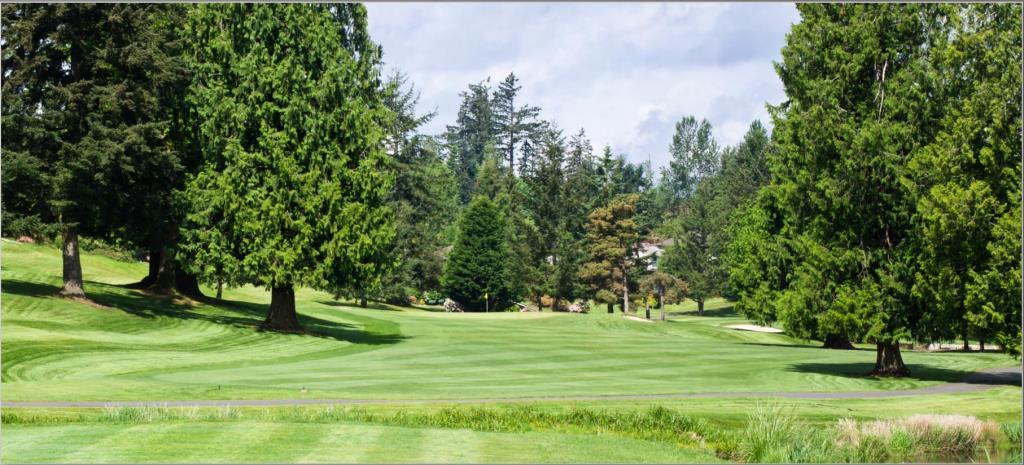
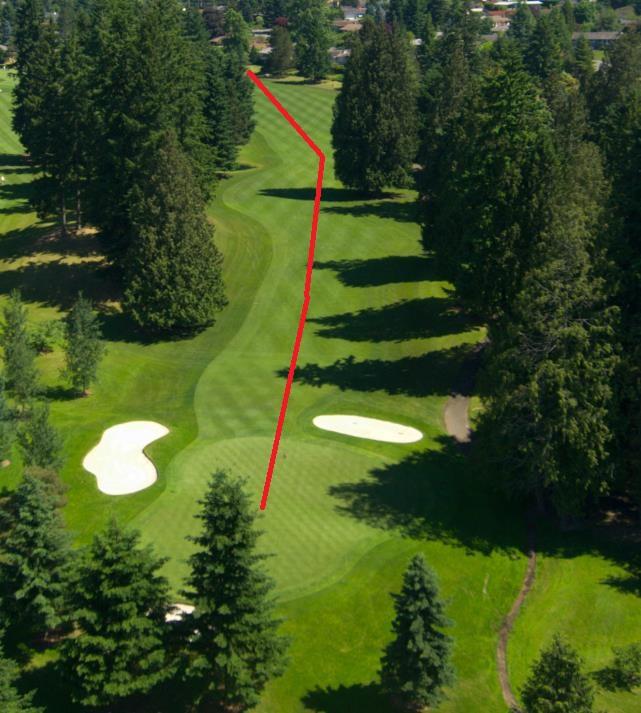
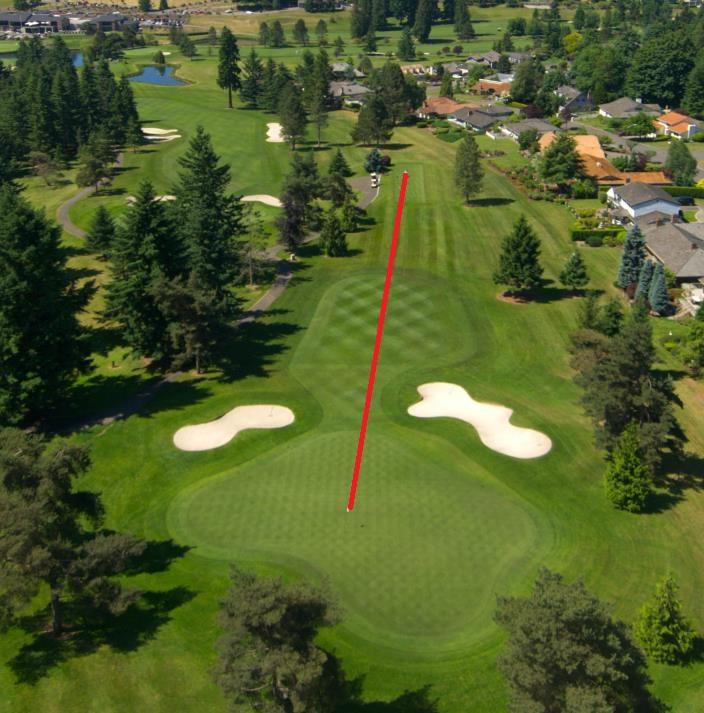
The first of four Par-3's and a nice introduction to what lies ahead. The tee and green stand somewhat level with a shallow valley in between. The large bunker on the right can be intimidating or interesting depending on your point of view.
Pro Tip:
This mid length par 3 is tricky. The green slopes pretty severely from back to front, especially from the middle and front areas of the green. Avoiding the right front bunker and the trees overhanging the left side is a bonus. Keep the ball below the hole and you should be okay.
| Tees | Yards | Par | H/C |
| Blue | 554 | 5 | 5 |
| White | 523 | 5 | 5 |
| Gold | 513 | 5 | |
| Red | 500 | 5 | 1 |
| Green | 354 | 5 |
Description:
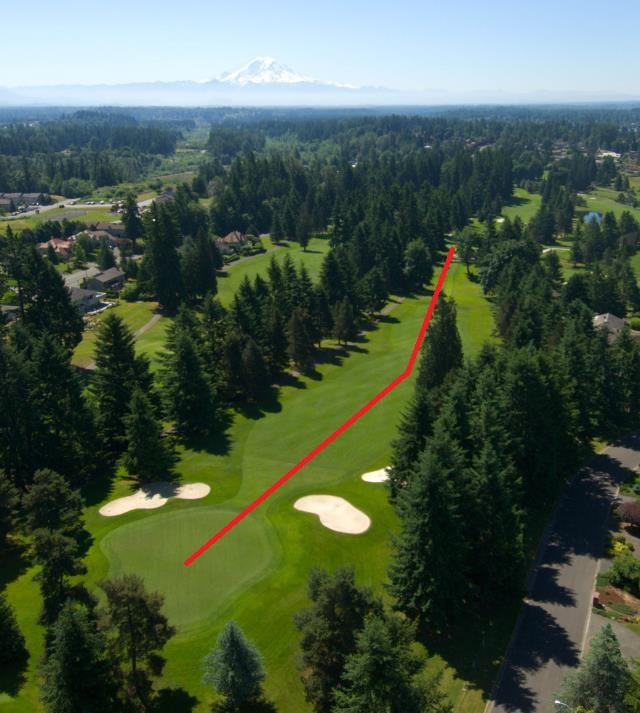
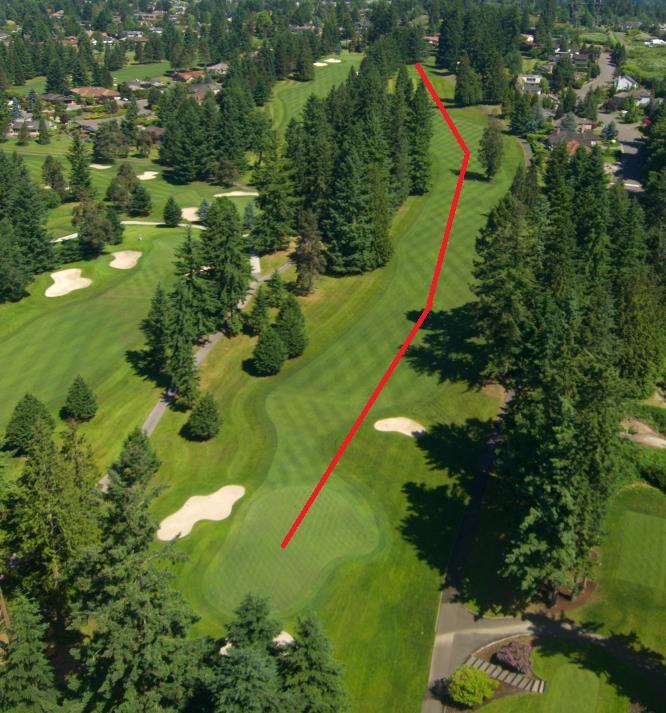
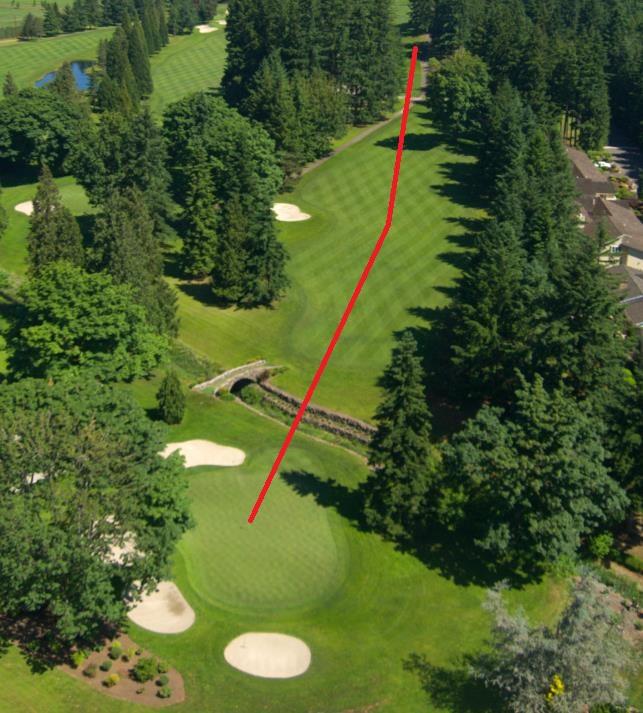
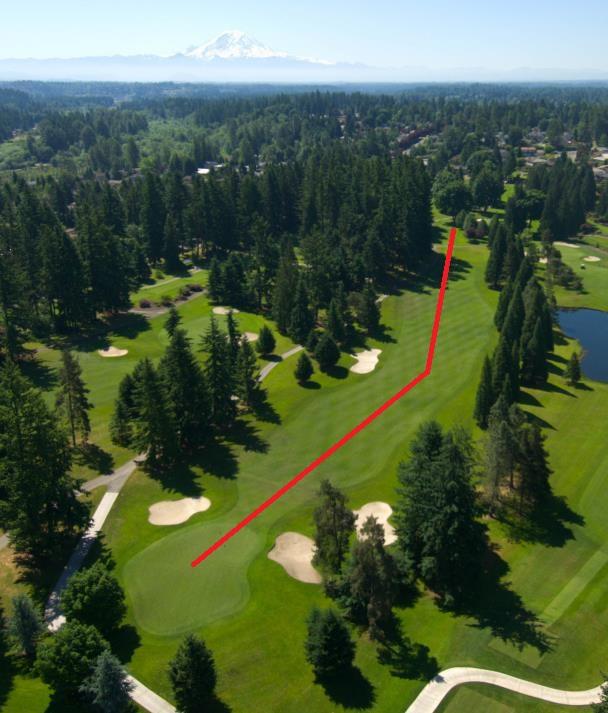
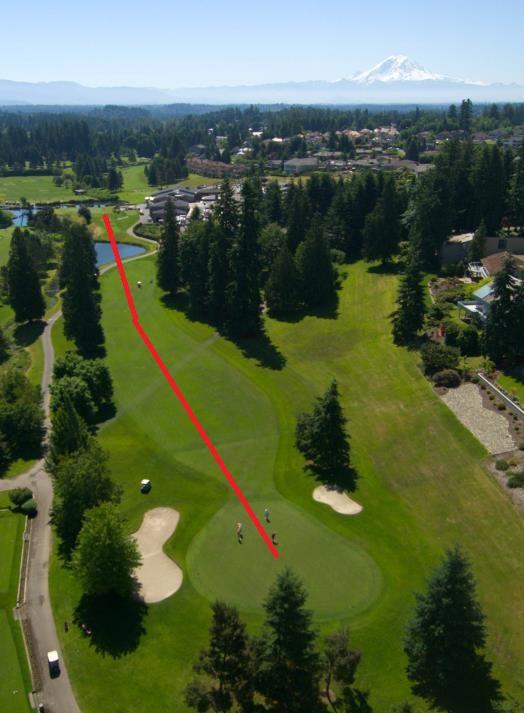
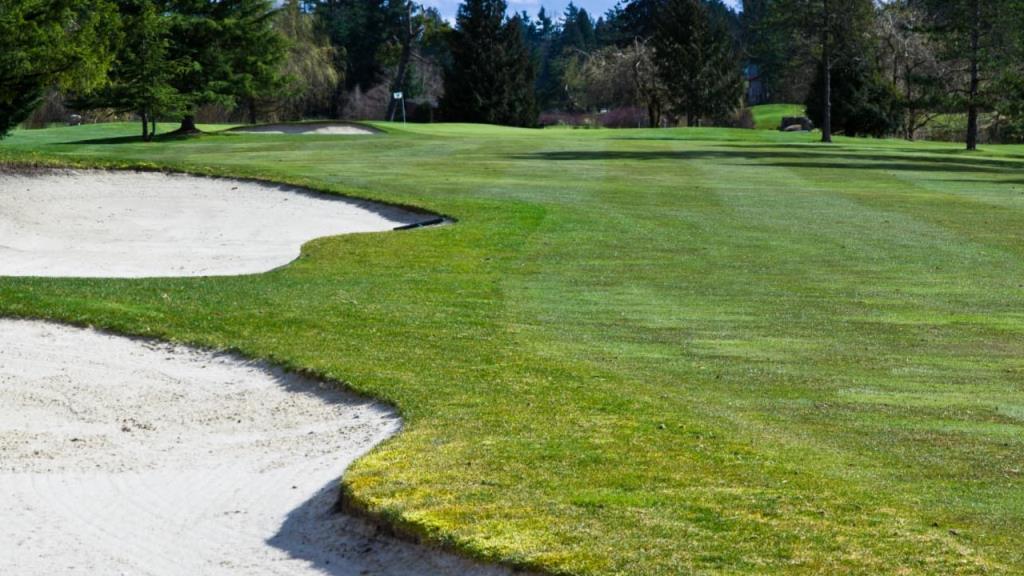
A long downhill ride with trees on the right all the way to the green. The grand fir left on the fairway is a natural beauty that can turn ugly should your ball fall too near.
Pro Tip:
Par 5 dogleg right. The tee shot is very important here. The reachable length makes you want to bomb driver. Be careful of the OB left and the very dark forest right. Many more pars and birdies are made by using an iron or fairway wood off this tee.
| Tees | Yards | Par | H/C |
| Blue | 426 | 4 | 1 |
| White | 373 | 4 | 1 |
| Gold | 354 | 4 | |
| Red | 336 | 4 | 3 |
| Green | 217 | 4 |
Description:
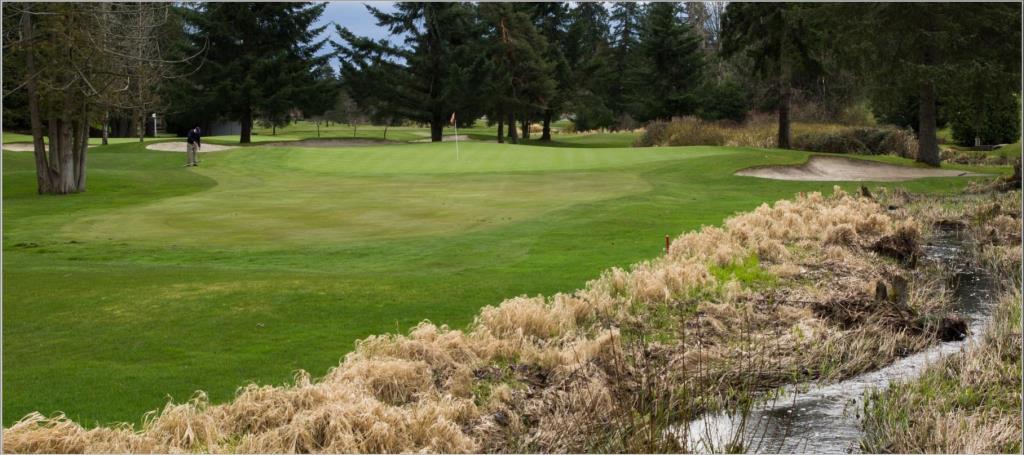
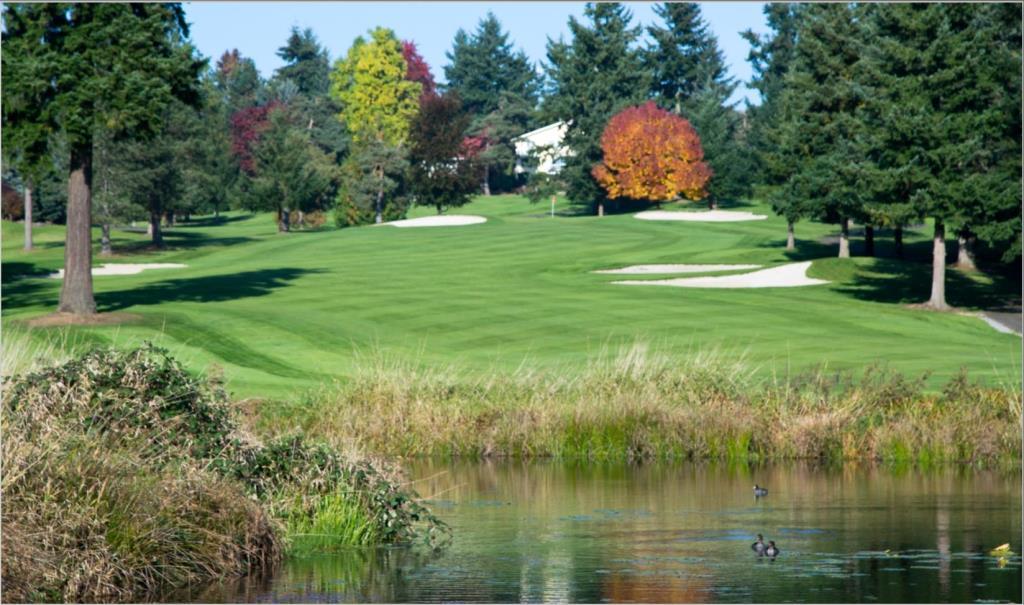
Mother Nature reworked this hole during the rainstorms of 1996. The runoff water dramatically widened Soos Creek along the front of the green and brought the water hazard more into play making it an interesting strategy hole.
Pro Tip:
Our signature hole! From the back tees this 417 yard par 4 is very long and you must drive it in the fairway. Avoid the blind creek just short of the green and you will see a very fast and very sloped green! Get your par and tiptoe to the next tee!
| Tees | Yards | Par | H/C |
| Blue | 185 | 3 | 17 |
| White | 170 | 3 | 17 |
| Gold | 137 | 3 | |
| Red | 120 | 3 | 17 |
| Green | 120 | 3 |
Description:
The large maple tree to the right shades the green while Soos Creek sneaks across the fairway directly below the elevated tees
Pro Tip:
Downhill par 3 that plays shorter than the distance on the card. Relatively flat green, just avoid the front bunkers and make your 3!
| Tees | Yards | Par | H/C |
| Blue | 392 | 4 | 3 |
| White | 373 | 4 | 3 |
| Gold | 351 | 4 | |
| Red | 340 | 4 | 9 |
| Green | 234 | 4 |
Description:
The tree lined fairway offers a straight path to the elevated green guarded by bunkers on both sides.
Pro Tip:
Par 4 dogleg right. Bomb your driver to allow yourself a short second shot. Beware of the fairway bunker on the right. Your approach shot is uphill to a green that requires an extra club. Be careful of the false front with a red flag!
| Tees | Yards | Par | H/C |
| Blue | 395 | 4 | 7 |
| White | 373 | 4 | 7 |
| Gold | 358 | 4 | |
| Red | 340 | 4 | 7 |
| Green | 340 | 4 |
Description:
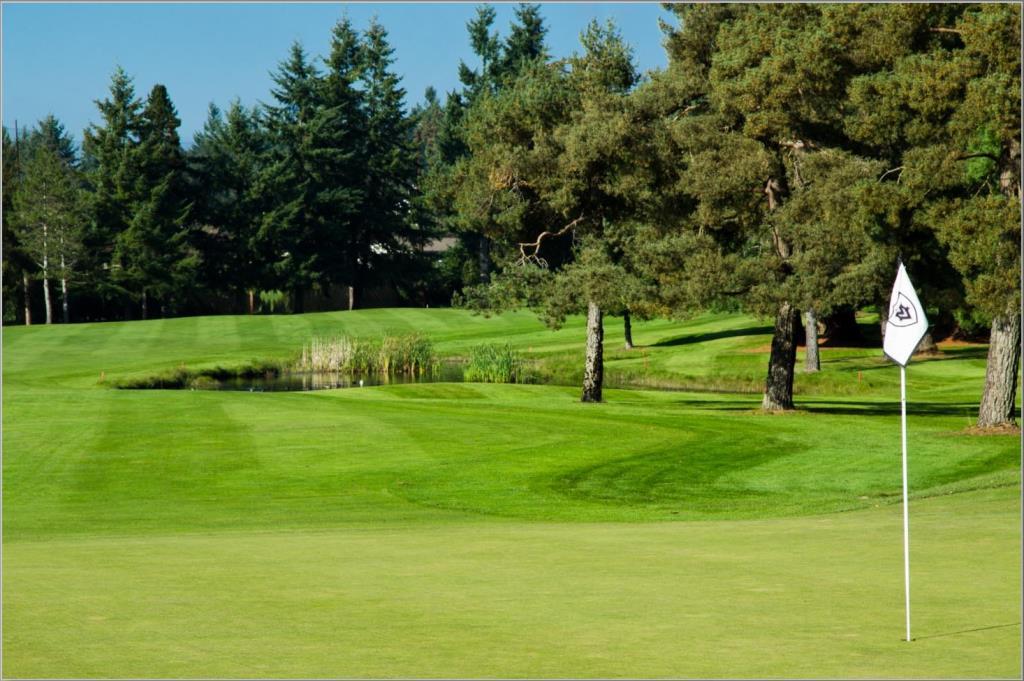
The large pond along the left side of the fairway beckons the daring and adventurous golfer to take a shot straight at the green and go for birdie.
Pro Tip:
Par 4 dogleg left. This dogleg with a pond just left of the fairway can be intimidating. Use a 3 wood off the tee keeping your tee shot right, it may make for a little longer approach, but it's easier from the fairway than it is from the water hazard!
| Tees | Yards | Par | H/C |
| Blue | 531 | 5 | 11 |
| White | 495 | 5 | 11 |
| Gold | 457 | 5 | |
| Red | 450 | 5 | 5 |
| Green | 356 | 5 |
Description:
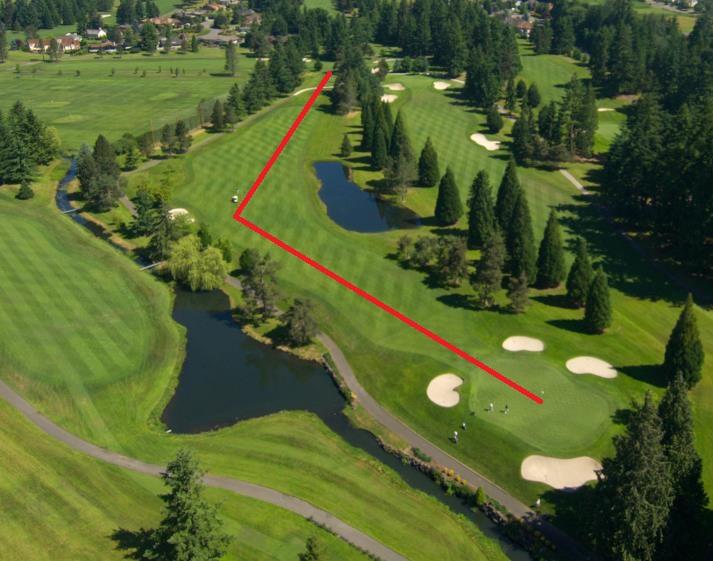
Once again, Soos Creek comes into play in front of the tee area and along the right side of the fairway. Water isn't the only challenge here - five bunkers keep it interesting all the way to the hole.
Pro Tip:
Par 5 slight dogleg left. Soos Creek looms large all the way down the right side of this hole. Get it in the fairway on your second shot to set yourself up for an approach to the green. The approach shot is uphill ever so slightly. You may want to add 1/2 to 1 club on your approach shot. The green has a fair slope from back to front.
| Tees | Yards | Par | H/C |
| Blue | 390 | 4 | 4 |
| White | 365 | 4 | 4 |
| Gold | 345 | 4 | |
| Red | 325 | 4 | 6 |
| Green | 240 | 4 |
Description:
After a quick stop at the clubhouse or snack bar, you're ready to challenge Soos Creek once again as it runs right along the fairway.
Pro Tip:
This may be the toughest driving hole on the course. A draw is perfect for this fairway that slopes toward the creek. Once you are in the fairway you have a fairly easy shot that plays slightly uphill. The middle of this green is always a good play. Watch out for the front left pin placement!

| Tees | Yards | Par | H/C |
| Blue | 373 | 4 | 6 |
| White | 338 | 4 | 6 |
| Gold | 310 | 4 | |
| Red | 296 | 4 | 12 |
| Green | 216 | 4 |
Description:
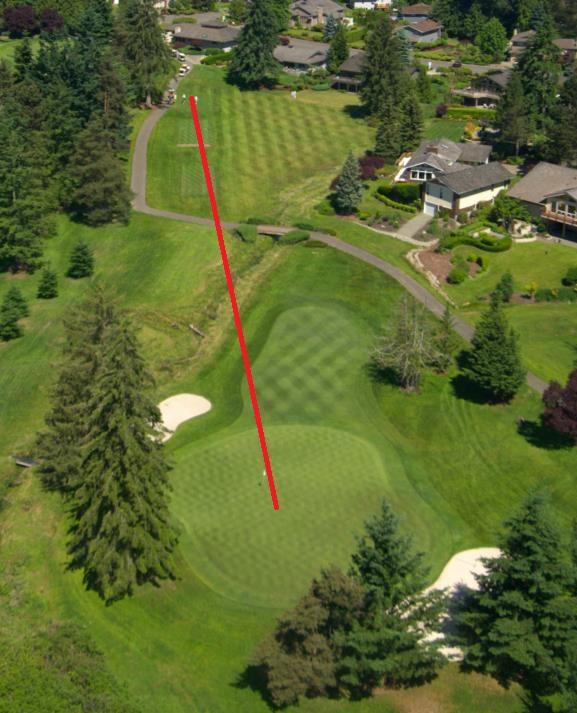
The bright and colorful flowers along the tee box belie the harsh reality of the large pond and uphill fairway that await you.
Pro Tip:
This dogleg right par 4 requires a tee shot in the fairway to make a par. Carry the pond in front of the tee and leave yourself around 150 yards to the hole. Big hitters beware, it is very easy to drive your ball through this fairway and have no shot. Your approach shot is uphill to a green with a mound running through the back middle. Hit your shot to the correct half of the green for a birdie chance!
| Tees | Yards | Par | H/C |
| Blue | 214 | 3 | 12 |
| White | 180 | 3 | 12 |
| Gold | 150 | 3 | |
| Red | 119 | 3 | 18 |
| Green | 119 | 3 |
Description:
This one looks harmless but as they say "looks can be deceiving". Not only do you have to avoid the winding path of the Soos Creek, you also have two greenside bunkers awaiting your arrival.
Pro Tip:
This is the longest par 3 on the golf course at 214 yards from the back tee. Be careful of the creek all along the right side and the front right bunker. In the summer time this hole plays a little shorter.
| Tees | Yards | Par | H/C |
| Blue | 382 | 4 | 2 |
| White | 372 | 4 | 2 |
| Gold | 360 | 4 | |
| Red | 269 | 4 | 14 |
| Green | 269 | 4 |
Description:
The narrow tee area gives way to a more open fairway but the fairway bunkers and well placed trees keep it interesting.
Pro Tip:
This hole is an uphill par 4. If you can hit a fade off of the tee you will be much better off. The approach shot to this two-tiered green requires an extra club to get the correct distance. Be careful when putting down the tier in the green.
| Tees | Yards | Par | H/C |
| Blue | 491 | 5 | 14 |
| White | 476 | 5 | 14 |
| Gold | 458 | 5 | |
| Red | 444 | 5 | 8 |
| Green | 444 | 5 |
Description:
It's a downhill ride but don't get too comfortable because it could turn bumpy. If you drift to the right, you'll find yourself in the trees or take a left turn and you'll be out of luck and out of bounds.
Pro Tip:
This is a reachable par 5 that is a dogleg right. Be careful with your tee shot, too far left and you could be OB or blocked by the tree in the fairway. Too far right and you could be in the pond along the fairway. Once in the fairway it is all downhill to this green that slopes away from you and is guarded by a front left bunker. This hole should give you an easy par or maybe even a birdie!
| Tees | Yards | Par | H/C |
| Blue | 444 | 4 | 8 |
| White | 378 | 4 | 8 |
| Gold | 354 | 4 | |
| Red | 349 | 4 | 2 |
| Green | 279 | 4 |
Description:
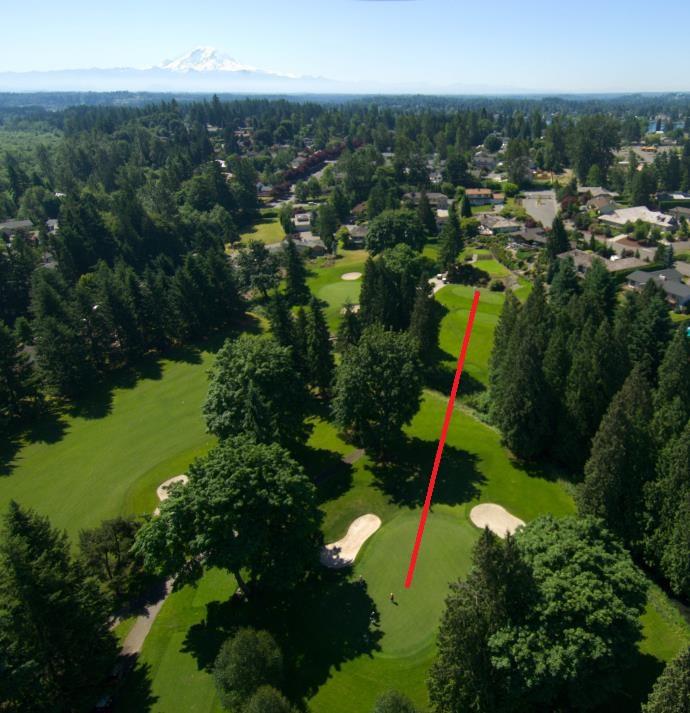
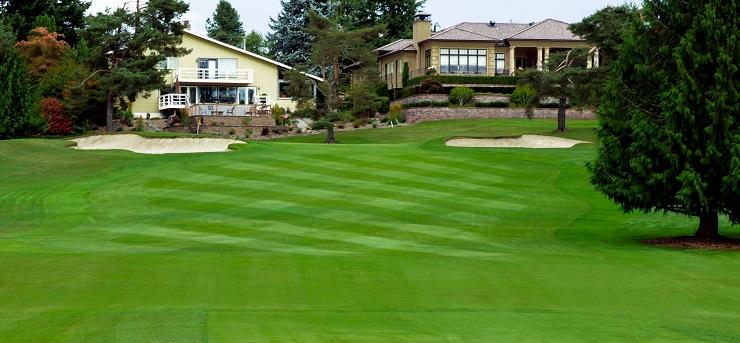
Keep it on the straight and narrow because this hole is straight and narrow with bunkers to the left and Soos Creek's final stretch along the right. If you follow the straight and narrow, a clear view of Mt. Rainier greets you at the green.
Pro Tip:
This is a straight away long par 4 that requires an accurate second shot. Avoid the creek on your right with the tee shot. This two-tiered green is guarded by a front left bunker and if you are long you will be in the Clubhouse pond.

| Tees | Yards | Par | H/C |
| Blue | 351 | 4 | 10 |
| White | 338 | 4 | 10 |
| Gold | 325 | 4 | |
| Red | 289 | 4 | 10 |
| Green | 230 | 4 |
Description:
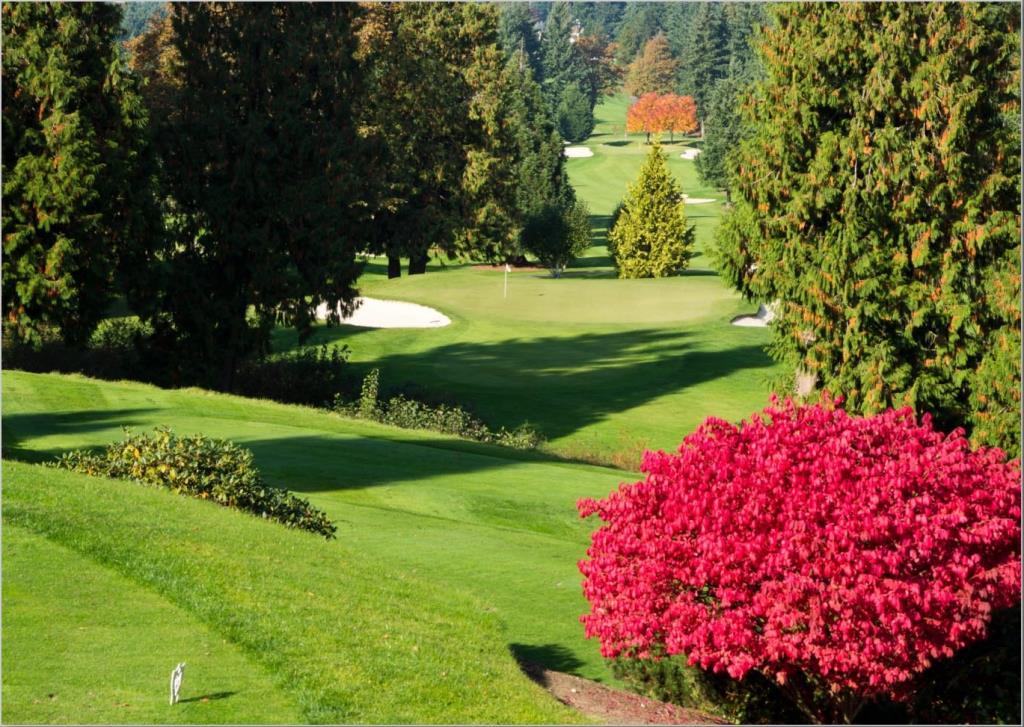
An uphill climb all the way to the green with many trees along the right to offer shade or shame depending on your shot.
Pro Tip:
Sixteen plays straight up hill and doglegs right. There are two fairway bunkers on the right and one long fairway bunker on the left. Once you have negotiated the fairway bunkers you are left with an uphill shot to a sloping green. Take an extra club and get the ball pin high for your best shot at birdie. Be careful with a front pin placement, as the green has a false front!
| Tees | Yards | Par | H/C |
| Blue | 173 | 3 | 18 |
| White | 162 | 3 | 18 |
| Gold | 152 | 3 | |
| Red | 142 | 3 | 16 |
| Green | 142 | 3 |
Description:
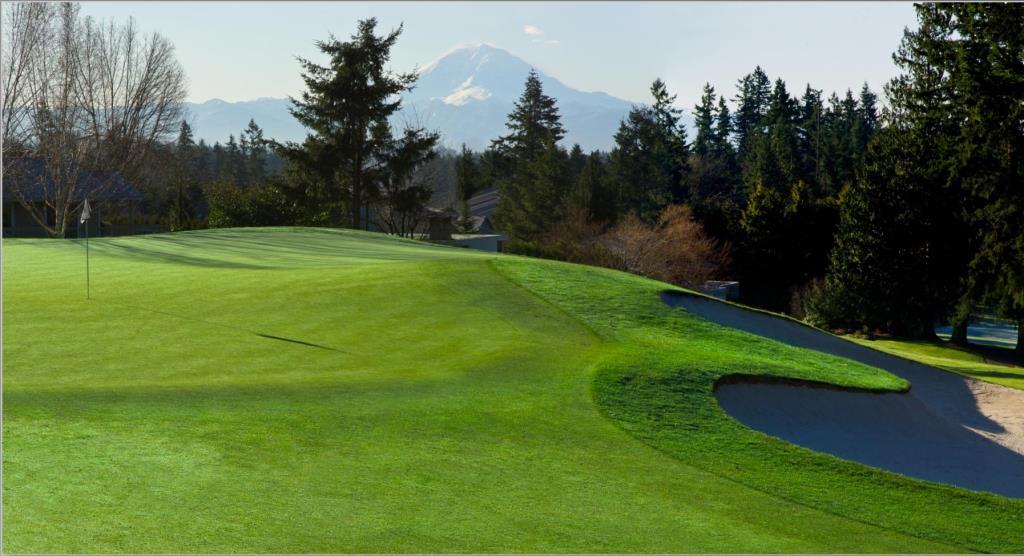
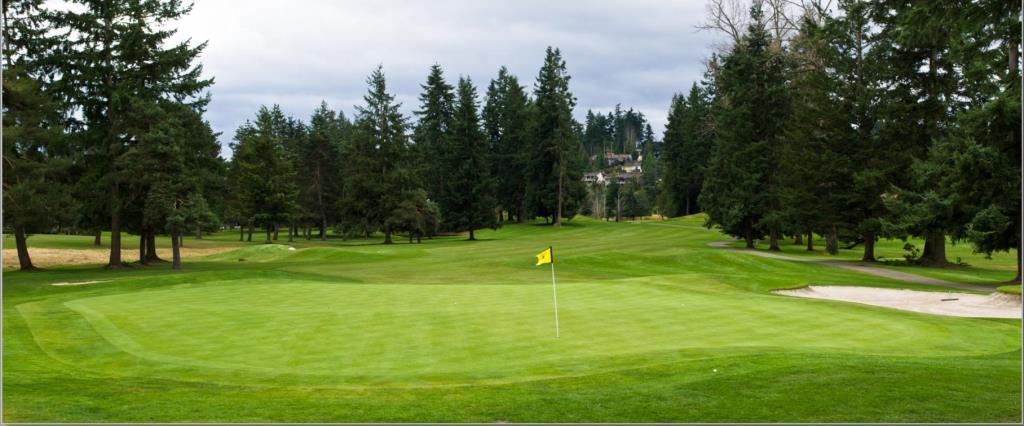
The founders named this hole the High Rise with good reason - you'll stand above it all on the green.
Pro Tip:
This uphill par 3 plays longer because of the hill. Take an extra club and get the ball on the correct tier for a chance at par.
| Tees | Yards | Par | H/C |
| Blue | 524 | 5 | 16 |
| White | 501 | 5 | 16 |
| Gold | 475 | 5 | |
| Red | 460 | 5 | 4 |
| Green | 460 | 5 |
Description:
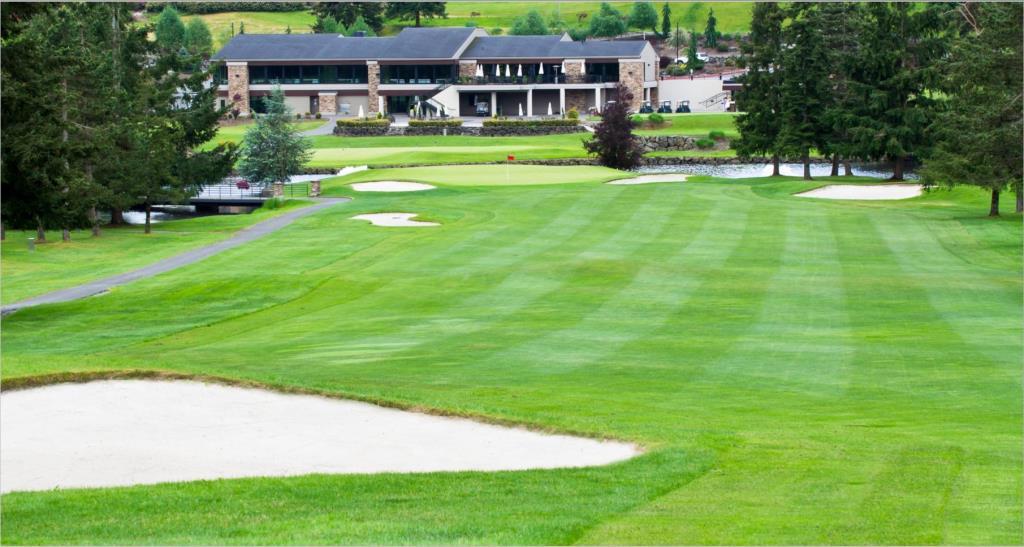
Meridian Valley brings together all its best features on the final hole - the lush green trees lining the downhill fairway, the crystal lake behind the green and a spectacular view of Mt. Rainier looming to the south.
Pro Tip:
The home hole! A downhill par 5 with great views of Mt. Rainier. Avoid the bunkers left and right of the fairway and you will have a downhill lie second shot. Big hitters can go for it in two, but the green is guarded on three sides by water. This two tier green has a very difficult back pin placement. Laying up on your second shot should give you a wedge to this hole.